#1, Make sure that Chromebooks are up to date
Chromebooks typically update themselves automatically, however we have noticed that students (and staff) do not restart their Chromebooks very often which can delay the installation of an update. Here's how to manually check for updates:
- Login to the Chromebook
- Click the status area, where the clock and your user account picture appears

- Click the "Settings" option (the gear icon)

- Click on "About Chrome OS" at the top of the window

- Click "Check for and apply updates"

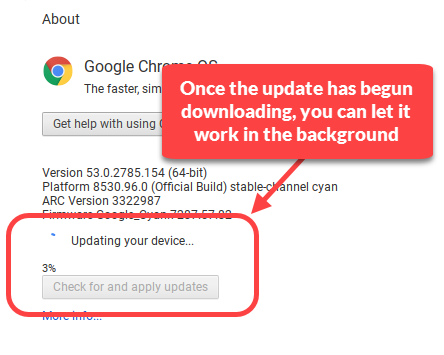
- If an update is available, it will begin downloading. When the update is downloading, you can let it continue in the background while you use the Chromebook (Drive, Classroom, Mail, etc.)

- When the update has finished downloading and is ready to install, an "Arrow" icon will appear in the status area next to the clock. Click the "Arrow"

- Click the "Restart to update" to install the update. The process will take 10-15 seconds and then you will be able to log back into the Chromebook

- Repeat this process until there aren't any more updates to install


#2, Make sure the Pearson TestNav app is working properly on each Chromebook
The Pearson TestNav should be automatically installed on each district Chromebook (it is not installed on a student's or staff member's personally owned Chromebook or device). However, it's important for each student to check to make sure that the app is working properly WELL BEFORE testing is scheduled to begin. Here's to how to check the Pearson TestNav app:
- Make sure that the Chromebook is at the login screen. If a student is logged in, they will need to sign out

- Click the “Apps” button at the very bottom of the screen and click “TestNav”

- If the Chromebook has NEVER been used for PARCC testing in the past or for the PARCC Practice Tests, the students will see a screen asking them to select their state. Students should click "Rhode Island"

- A “Sign In” screen will appear with "Rhode Island" at the top. The Chromebook is all set to use the Pearson TestNav app for PARCC testing. Skip to Section #3

- If the Chromebook has been used for PARCC testing in the past, the TestNav app MAY open directly to the "Rhode Island" Sign In screen. If the TestNav app opens directly to the "Rhode Island" Sign In screen, Chromebook is all set to use the Pearson TestNav app for PARCC testing. Skip to Section #3
- If the TestNav app opens to the "PARCC Training" Sign In screen OR opens to another state's Sign In screen, click on the “Person” icon at the top of the screen and select "Choose a different customer"

- Click on "Rhode Island"
- A “Sign In” screen will appear with "Rhode Island" at the top. The Chromebook is all set to use the Pearson TestNav app for PARCC testing


#3, Make sure that each Chromebook's headphone jack is working properly
Students will be required to use earbuds or headphones for portions of the PARCC test in order to hear audio and video passages. It's important for each student to check to make sure that the headphone jack of their Chromebook is working properly WELL BEFORE testing is scheduled to begin. Here's how each student can check the headphone jack of their Chromebook:
- Make sure that the Chromebook is at the login screen. If a student is logged in, they will need to sign out

- Click the “Apps” button at the very bottom of the screen and click “TestNav”

- The TestNav app should open to the Rhode Island Sign In screen

- Plug-in a pair of headphones or earbuds into the Chromebook headphone jack
- Click the "Test audio" link on the TestNav "Sign In" screen and listen in the headphones/earbuds for the test sound

- If the student is able to hear the test sound through the headphones/earbuds, the Chromebook's headphone jack is ready for PARCC testing
- If the student CANNOT hear the test sound, hold down the "Volume up" key on the keyboard to increase the volume and then click the "Test audio" link again

- If the student still CANNOT hear the test sound, try trying a set of headphones/earbuds that are known to be working with another Chromebook
- If the student still CANNOT hear the test sound with the second set of headphones/earbuds, please let the technology department know so we can address the issue


