Monday, June 6, 2016

Exporting or Downloading a Google Site

If you are a staff member who is leaving the district or a student who is leaving school, you may want to export or download any Google Sites that you have created. Because a Google Site is can be comprised of multiple pages with a variety of different functions, it can be more complicated than simply downloading an individual document.

Here are two methods to export or download a Google Site, each with their pros and cons:

Save pages of a Google Site as PDF

Using the Chrome web browser, you can easily "print" each individual page of a Google Site as a PDF and save those pages to any device you prefer. This may be the quickest and easiest way to download a simple Google Site with only a few pages. However, this could be tedious for a larger Site.
  1. Open up Google Chrome and go to your Google Site
  2. Starting with the home page, click on the menu button in the upper right corner of Chrome and select "Print"
  3. Click the "Change" button to select a different destination
  4. Select "Save as PDF"
  5. Click "Save"
  6. The page of the Google Site will be downloaded as a PDF
  7. Repeat the process for each page of the Google Site

Export an entire Google Site

There currently isn't any "built-in" method to download or export an entire Google Site. However, there is an open source Google Sites Import/Export Tool available that will allow for the export of a Google site. Because this tool is open source, it is not officially supported by Google and it requires that you use a Windows or Mac OS X computer or laptop that has Java installed. These instructions do not cover how to download and install Java for your personal computer, so you will need to take care of that on your own. You cannot use a Chromebook, iPad/iPhone, or Android device with this tool. Lastly, the tool is not particularly easy to use, so it may not be the best option for someone with very basic computer skills.
  1. Download the latest version of the Google Sites Import/Export tool (currently version 1.0.6) from https://github.com/sih4sing5hong5/google-sites-liberation
  2. Double-click on the ".jar" file you downloaded to open the tool. If you do not have Java installed, the tool will not open
  3. You will need to get some information about your Google Site in order to provide the tool with the necessary information to export the Site. Go to http://sites.google.com and sign in with your Smithfield Google account to get this information
  4. Fill in the "domain" and "webspace" for your Google Site into the corresponding fields of the Import/Export Tool
  5. Click "Choose Target Directory" to choose where to export/download your Google Site. I would recommend creating a new folder on your computer to use as a location
  6. Select a folder on your computer to use as the location to download your Google Site
  7. Click "Get a token from browser" to give the Google Sites Import/Export Tool permission to manage your Google Sites. The tool requires this permission in order to export your Site
  8. Your web browser should open (you may be required to login to your Smithfield Google account). Click "Allow" to give the Google Sites Import/Export Tool permission to manage your Google Sites
  9. Copy the long text "token" from the web page that appears
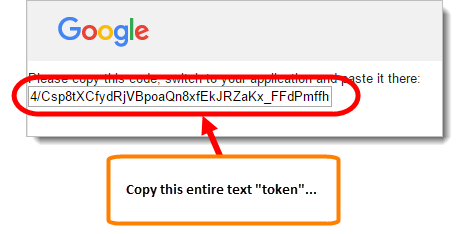
  10. Paste the long test "token" into the Import/Export Tool
  11. Click "Export from Sites" to start the export/download process
  12. Depending on the size of your Google Site, it may take a while to completely export/download the Site. Click "Done" when the process is complete
  13. In the folder on your computer that you identified as the "Target Directory", you should see individual folders for each page of your Google Site

Friday, June 3, 2016

Exporting Data from your SPS Google Account

If you are a staff member who is leaving the district or a student who is leaving school, you can export the majority of your files and data from your Smithfield Google account using a tool called Google Takeout. Takeout will allow you to download your files and data so that you can take it with you and access it even after your Smithfield Google account is disabled.

Takeout will allow you to export your email, contacts, calendar, files from Drive, notes from Google Keep, and blog posts from Blogger (staff only). However, you will not be able to use Takeout to export any Google Sites that you may have created, so you will need to download your Sites using separate instructions.

Depending on how many files and how much data you have in your Smithfield Google account, Takeout can take hours (even days) to assemble your account archive, so please plan accordingly (i.e. don't wait until the last minute). Also, you can access Takeout from home using a personal device, so you do not need to be at school or using a school owned device to export your files and data.
  1. Open a web browser, go to www.google.com, and make sure to sign in using your Smithfield Google account
  2. Go to www.google.com/takeout
  3. Choose the services from which you would like to export your data. The district does not use Google Fit, so that data will not be available
  4. Click the small arrow in each service's section to adjust the settings. For example, in the "Drive" section, you can choose to download all of the files and folders from your Drive or select only specific files and folders. You can also adjust which format the files are exported to (e.g. Google Docs to Word, PDF, or RTF)

  5. Click "Next"
  6. Choose the file type of the data archive and how you want the data to be delivered. In most situations, the default ".zip" file format and "Send download link via email" will work best
  7. Click "Create archive"
  8. Depending upon how many files and how much data you have in your account, it can take hours or even days to create the archive. If you chose the "Send download link via email" option, you will receive an email when the process is complete. You can also go to www.google.com/takeout any time to check on the progress of creating your archive
  9. Once your data archive is ready, you can download it from www.google.com/takeout. Depending upon how many files and how much data you have in your account, your data archive can be quite large, so you will need to download it using a computer or device with enough storage space
  10. Once you download the archive, you can open it or extract it and access the data from each individual service

Wednesday, May 11, 2016

Start or Join a Video Hangout

This is a follow up to the introductory Start a Chat using Hangouts post from earlier in the week.

Using Hangouts allows you to have text and video conversations with other Google users around the world. These conversations are not limited to one on one; you can also have text and video conversations with groups of people. Using Hangouts is a great way to increase communication and collaboration among colleagues.
Because Hangouts is a very flexible tool, it can also be a bit confusing. There are MANY ways to start and join a video conversation and each way can vary depending upon what device you are using. For this tutorial, we will look specifically at how to access and start a Hangout video conversation using Google Chrome. You could be using Chrome on a PC, Mac, or Chromebook and this tutorial will apply.

Starting a Video Hangout

  1. Open Google Chrome
  2. Go to http://hangouts.google.com
  3. Click the "Video Call" button
  4. Check your audio and camera settings by clicking the "Settings" button at the bottom of the window
  5. Select the camera, microphone, and speakers that you would like to use and click "Save"
    TIP: It is HIGHLY recommended to use headphones or earbuds. It helps cut down on feedback and echoing during the Hangout
  6. To start a new Video Hangout, enter a "Hangout Name" and press ENTER on the keyboard
    TIP: You want to make your Hangout name unique, so consider including the date or your initials in the name
  7. At the top of the video window, there is a row of buttons to manage the Hangout, control your microphone, control your webcam, and leave the Hangout
  8. Click "Invite People" to invite others to the Hangout
  9. Choose whether to allow people outside of your domain to join the Hangout

  10. Search for people to invite to a conversation by email or by name
    Note: if the person has never used Hangouts OR you have never chatted with them before, you may need to specifically search for them by email
  11. Click "Invite"
  12. As people accept the invitation and join the Hangout, they will appear at the bottom of window. Up to 25 people can participate in a Hangout at once!
  13. To leave the Hangout, click the "Leave call" button

Joining a video Hangout

  1. If you are logged into your Google email or you have Hangouts already open at http://hangouts.google.com, you may see a pop-up window inviting you into a video Hangout. You can click "Answer" in the pop-up window to join the Hangout. If you miss the pop-up, you can also click the green "camera" icon to join the video Hangout
  2. If you are not logged into your Google email or you just miss the invitation, you can go to http://hangouts.google.com to see if the video Hangout is listed in your Conversation list. If it is, you can click on it to bring up the pop-up window and click the green "camera" icon to join the Hangout
  3. Once you join the video Hangout, you will see the same options at the top of the window to manage the Hangout, control your microphone, control your webcam, and leave the Hangout

Friday, May 6, 2016

Start a Chat using Hangouts

One of the most useful tools available within Google Apps for Education is Hangouts. Using Hangouts allows you to have text and video conversations with other Google users around the world. These conversations are not limited to one on one; you can also have text and video conversations with groups of people. Using Hangouts is a great way to increase communication and collaboration among colleagues.


Because Hangouts is a very flexible tool, it can also be a bit confusing. There are MANY ways to start and join a conversation and each way can vary depending upon what device you are using. For this tutorial, we will look specifically at how to access and start a Hangout text conversation using Google Chrome. You could be using Chrome on a PC, Mac, or Chromebook and this tutorial will apply.

  1. Open Google Chrome
  2. Go to http://hangouts.google.com
  3. Click the "Message" button
  4. Search for people to invite to a conversation by email or by name. Note: if the person has never used Hangouts OR you have never chatted with them before, you may need to specifically search for them by email
  5. Click the checkbox next to a person to invite them to a conversation
  6. Click the "Message" button to open a conversation
  7. Depending on how the person's account is configured, they MAY need to formally accept your invitation before they see any of your messages. If that's the case, Click "Send Invite". You will not be able to send them messages until they accept your invitation
  8. To send the person a message, type the message at the bottom of the window and press ENTER on the keyboard. You can use the small buttons at the bottom of the window to add emoji and images
  9. The person's replies and a chronological history of the conversation will appear in the window. You can invite additional people into the conversation by clicking the small "Create a Group Hangout" button at the top of the window
  10. To exit the Hangout conversation, just close the Hangout window by clicking the "X" in the upper right corner of the window